Let’s Encrypt SSL/TLS certificates on Webfaction
You may have noticed lately that pages that aren’t secured with HTTPS are starting to show increasingly more concerning browser icons and messages. I think this trend is set to continue until one day HTTP will no longer be supported. The problem (until recently) has been that to get a certificate that keeps web-browsers happy (I mean the software, not the humans) meant purchasing one. For small personal sites this cost was enough to put most off using SSL/TLS. I don’t know know the history of Let’s Encrypt but they look like a not for profit set up to facilitate free SSL/TLS certificates with the aim of securing the whole of the internet. This is a great idea, the only draw back for me being that setting up an HTTPS site with Webfaction and Let’s Encrypt is a serious pain. Luckily a few kind people have developed tools to help things along a bit. This is my setup which works well for the sites I manage (a couple of WP sites and a few Rails and Django apps, and my recently added IoT services).
The basic flow goes something like this:
- Make an API call to Let’s Encrypt for a particular domain(s)
- Let’s Encrypt sends back a key which you must make publicly available at the HTTP root of the domain
- Let’s Encrypt tries to access the key, which proves to them that you are the manager for that domain
- Let’s Encrypt sends you back the certificates and private key
- You load these into Webfaction (through the UI or API)
- Associate the certificate with a secured website in Webfaction
- Renew this process every 90 days when the certificates expire.
YIKES!!!
- Setup up a static app in the Webfaction web control panel
- Create a HTTP website and point it to the static app, add any domains that you wish to have as HTTPS to this app (they will be redirected to the secure site). You only need one app and website for all the domains you want to use with HTTPS.
- Access Webfaction via SSH and change to the static app directory.
- Create a .htaccess file with the following lines
RewriteEngine On RewriteCond %{HTTP:X-Forwarded-SSL} !on RewriteCond %{REQUEST_URI} !^/.well-known RewriteCond %{QUERY_STRING} !^/.well-known RewriteRule ^(.*)$ https://%{HTTP_HOST}%{REQUEST_URI} [R=301,L]- This is basically forwarding any requests that arrive via HTTP to the same domain with HTTPS
- It is also filtering off any requests with .well-known in them. They are used for the Let’s Encrypt domain validation process.
- Install the acme.sh script which is going to help us get a valid Let’s Encrypt SSL certificate.
-
[[code]]czoxMTM6XCJnaXQgY2xvbmUgaHR0cHM6Ly9naXRodWIuY29tL05laWxwYW5nL2FjbWUuc2guZ2l0DQo8c3BhbiBjbGFzcz1cXFwicGwtY3tbJiomXX0xXFxcIj5jZDwvc3Bhbj4gLi9hY21lLnNoDQouL2FjbWUuc2ggLS1pbnN0YWxsXCI7e1smKiZdfQ==[[/code]]
-
- Download file called load_certs.py in your $HOME directory in Webfaction account
cd $HOME wget https://github.com/tmcadam/webfaction-tools/load_certs.py- This script is used to load the newly created certs into Webfaction using it’s API.
- Create environment variables.
- Open up
$HOME/.bashrcand add the following lineexport WEBFACTION_USER="username-here" export WEBFACTION_PASS="password-here" export WEBFACTION_MACHINE="Web###"
- Open up
- Run acme.sh script to create a certificate. Here is an example
acme.sh --issue \ -d smartworldbox.com \ -d www.smartworldbox.com \ -d node-red.smartworldbox.com \ -d mqtt.smartworldbox.com \ -w /home/username/webapps/https_redirect/ \ --reloadcmd "bash $HOME/.bashrc && python2 $HOME/load_certs.py smartworldbox.com $HOME/.acme.sh/smartworldbox.com/"- This is creating a certificate for the listed domains and then loading them into Webfaction using it’s API. The really really cool thing is, this will renew the certificates for us every 60 days. So once you run the command once, you should be able to forget about it.
- Make sure -w is pointing to the static app we created earlier.
- The two parameters for the python script are, domain name (I think it needs to be the first one), and the folder location of the certificates. When the the certificates are loaded to Webfaction they are named with domain name (but the dots are converted to underscores)
- Checkout https://github.com/Neilpang/acme.sh for more info
- Final step is to create secure HTTPS website records
- This is done in the Webfaction control panel. Select the certificate that was just created (smartworldbox_com in this instance). Select the application that you want to secure (i.e. node-red).
- Leave the other static app and website in place to handle certificate renewals and redirect HTTP traffic to this new secure site.
- As I said before this whole process is a one off and the certificates should renew automatically every 60 days.
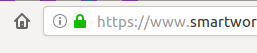
- Goto the browser and you should see a nice little padlock beside your domain name 🙂